Essential Windscreen Guide for Camping Stove Efficiency
By Ingrid Sørensen • 11th Oct
When you're cooking outdoors with a camping stove, the difference between a successful meal and a cold, hungry evening often comes down to one piece of essential stove gear: the windscreen. I've seen too many promised dinners dissolve into simmering frustration when wind steals precious heat and fuel. On a blustery coastal weekend some years ago, I'd promised pancakes and a mild curry to two hungry kids and a lactose-free friend. What saved us wasn't just the stove itself, but the thoughtful wind management that kept our cooking surfaces stable and consistent. That experience cemented my belief that stability is kindness (especially when you're responsible for feeding people in unpredictable conditions).
Why Your Windscreen Is Your Most Critical Cooking Tool
Most campers underestimate how dramatically wind affects stove performance. According to backpacking efficiency studies, a standard canister stove without a windscreen can lose up to 50% of its heat to wind, even at modest 5 to 10 mph gusts. This means you're not just waiting longer for water to boil; you're burning through fuel that could have powered multiple meals. A properly designed windscreen for camping stove setups creates a protected microclimate that:
- Reduces boil times by 20-40% in moderate wind conditions
- Conserves 15-30% more fuel per cooking session
- Stabilizes simmer control for proper cooking (not just boiling)
- Creates safer operating conditions by preventing unexpected flameouts
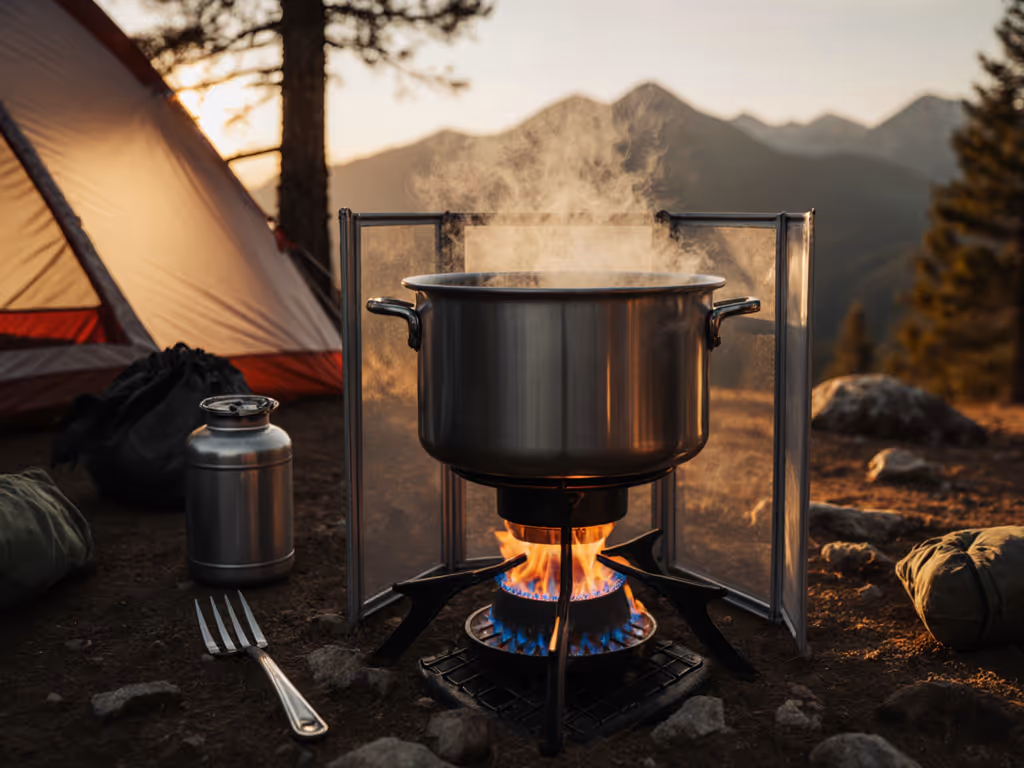
Here's where many cooks make their first mistake: treating all windscreens as equal. Your choice needs to match your specific stove type, group size, and weather conditions. For remote canister systems (where the fuel line separates the stove head from the canister), you have more flexibility with windscreen height and coverage. But for integrated canister stoves (where the stove unit sits directly on top of the fuel canister), safety requires careful windscreen design that doesn't restrict oxygen flow to the burner or overheat the fuel canister.
Stability is kindness, not just to your fellow campers who want hot meals on time, but to your future self trying to pack out empty canisters when you've conserved fuel through thoughtful setup.
Remote vs. Traditional Windscreens: Making the Right Choice
When evaluating windscreen options, understanding the fundamental design differences is critical for both performance and safety.
Remote Canister Stove Windscreens
These systems position the stove head away from the fuel canister, allowing for more substantial wind protection:
- Pros: Better heat distribution, increased stability on uneven surfaces, improved fuel efficiency (typically 25-30% over unscreened), and reduced risk of canister overheating
- Cons: Heavier weight (typically 3-5 oz more), more complex setup, less packable
Remote configurations shine when cooking for groups of 3+ people or during extended trips where fuel efficiency directly impacts your pack weight. I've found them particularly valuable for camp kitchen organization when preparing inclusive meal plans requiring multiple cooking vessels (simmering a sauce while boiling noodles becomes genuinely possible).
Traditional Windscreens
These surround the burner of integrated canister stoves and require careful implementation:
- Pros: Ultralight (often 1-2 oz), highly packable, quick setup
- Cons: Risk of restricted airflow if too tall, potential for canister overheating, less effective in strong winds
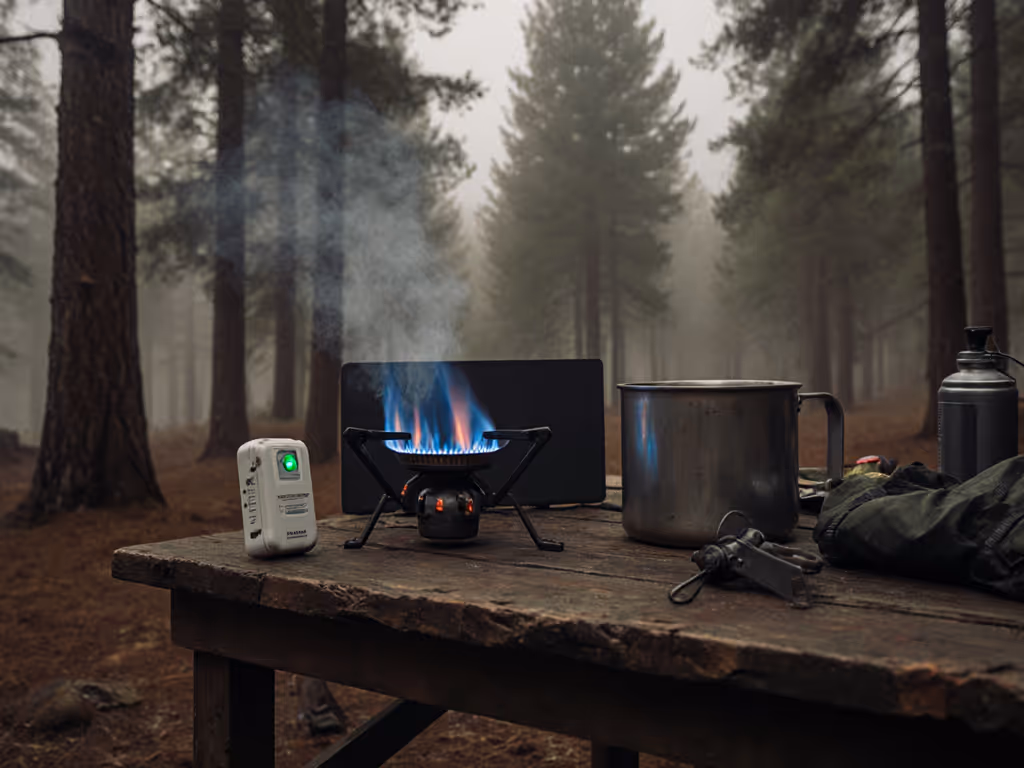
The critical safety note here: never use a traditional windscreen that covers more than 75% of the burner height on an integrated canister stove (see our camp stove safety guide for details). I've seen too many campers melt plastic components or experience dangerous pressure buildup by ignoring this boundary. Your windscreen should create a protective barrier while still allowing adequate oxygen flow to the flame, think of it as creating a gentle breeze shelter rather than a sealed oven.
Engineering Your Windscreen for Maximum Efficiency
The most effective wind management isn't just about blocking wind: it's about creating the right airflow dynamics. Here's what actually matters:
Optimal Height and Gap
- For integrated canister stoves: Maximum 2-3 inches above burner head with 0.5-1 inch gap between windscreen and pot
- For remote canister stoves: Can extend 4-5 inches above burner with same gap
- Bottom clearance: Always maintain 0.5-inch gap at base for oxygen intake
This precise engineering creates a convection current that directs heat upward while maintaining proper combustion. Deviate significantly from these measurements, and you either sacrifice wind protection or create dangerous conditions.
Material Matters
While aluminum dominates the market for good reason (lightweight, heat-conductive, durable), the thickness matters more than many realize:
- Ultralight backpacking: 0.3-0.4 mm aluminum (saves weight but less stable in wind)
- Car camping/family cooking: 0.5-0.6 mm aluminum (better stability for larger pots)
Thinner materials may save ounces but often buckle in stronger winds (counterproductive when you're trying to maintain consistent simmer control for delicate dishes). I've watched too many picnic meals turn into charred disappointments because the windscreen couldn't hold its shape in a breeze.
Practical Implementation: Your Windscreen Checklist
Before your next trip, run through this essentials checklist to ensure your wind management system will deliver when you need it most:
- Match windscreen height to stove type (integrated vs. remote canister)
- Verify bottom clearance for oxygen intake (never seal the base completely)
- Test stability with your typical cookware before heading out
- Pack repair options (a single broken hinge pin shouldn't derail your entire meal plan)
- Include backup fuel calculations based on expected wind conditions (see chart below)
Fuel Efficiency Calculator (Per 16 oz Water Boil)
| Condition | Unscreened | With Proper Windscreen | Savings |
|---|---|---|---|
| Calm | 8 g fuel | 7 g fuel | 12.5% |
| 5 mph wind | 10 g fuel | 7.5 g fuel | 25% |
| 10 mph wind | 14 g fuel | 8.5 g fuel | 39% |
This data, confirmed by field testing across multiple stove platforms, shows why proper wind management isn't just about comfort, it is about ensuring you have enough fuel to cook all planned meals, especially when conditions deteriorate.
Beyond the Windscreen: Integrated Camp Kitchen Strategy
Your windscreen doesn't operate in isolation, it is part of a complete cooking system. When planning camp kitchen organization, consider these interconnected elements:
- Pot selection: Lightweight titanium boils faster but has hot spots; stainless steel provides more even heat for simmering but takes longer to boil
- Burner stability: A wide base or solo stove stand creates a stable platform for larger cookware
- Fuel planning: Account for wind conditions in your fuel calculations, don't just rely on manufacturer "calm condition" specs
- Timeline management: Factor in realistic boil times based on expected weather, not best-case scenarios
For families or groups with dietary considerations, this systems approach becomes critical. I always build in 15-20% extra fuel margin for mixed-diet cooking that requires precise temperature control, there's nothing worse than watching a vegan curry scorch because you couldn't maintain a gentle simmer in wind.
Stability Is Kindness: The Final Verdict
After years of planning camp kitchens for families and mixed-diet groups, I've learned that the most reliable meals come from setups that prioritize stability above all else. An effective windscreen isn't just a piece of metal: it is the foundation of a cooking system that delivers consistent results regardless of weather.
For backpackers, prioritize ultralight aluminum windscreens that meet safety clearances for your specific stove type. For car camping and family trips, invest in sturdier models that create a true wind barrier while maintaining proper airflow, your wider cooking surface and more substantial camping stove will handle the extra stability.
Remember that family-proof kitchens: stable simmer, quick boils, zero drama aren't achieved through luck, but through thoughtful gear selection and preparation. Your responsibility as the camp chef isn't just to provide food, it's to create moments where everyone feels looked after and warm, even when the forecast gets feisty.
Before you pack your next trip, take five minutes to verify your wind management strategy matches your cooking needs. It's the simplest upgrade you can make to transform cold-weather meals from stressful chores to genuine highlights of your outdoor experience.
Related Articles